
Connect your Outlook Calendar to 800.com to automatically schedule appointments and keep your calendar up to date.
Once connected, appointments can be added directly to your Outlook Calendar based on your availability, helping you reduce scheduling conflicts and streamline your booking process.
Before You Begin
Before connecting Outlook Calendar, make sure you have:
- An active 800.com account
- A Microsoft account with access to Outlook Calendar
- Permission to authorize third-party applications
Step 1: Getting Started
- Log in to your 800.com account
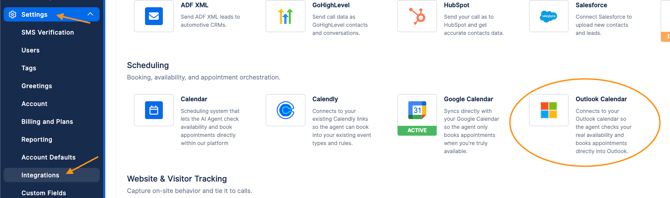
- Navigate to Settings > Integrations
- Scroll down to the Scheduling section
- Select Outlook Calendar
Step 2: Connecting To Outlook Calendar
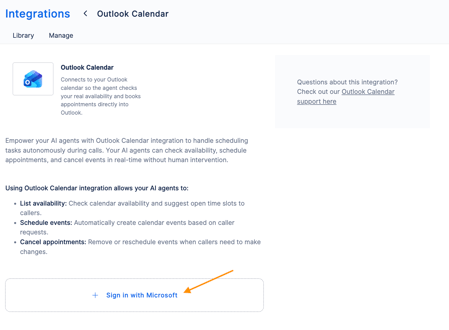
- Choose the Outlook Calendar account you wish you connect by clicking Sign in with Microsoft
- Hit Next
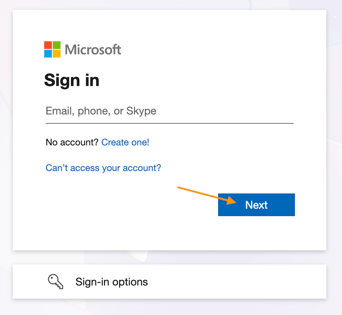
- Allow 800.com access to your Outlook Calendar Account
Step 3: Setting Up Your Configuration
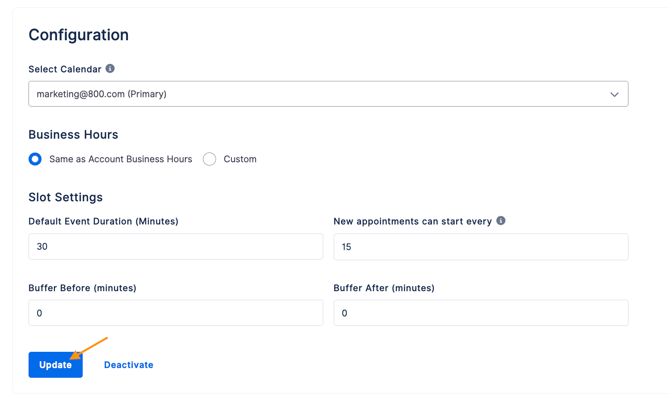
Now that you have made the connection to you Outlook Calendar Account it is time to setup your Outlook Calendar configuration.
Complete the following information:
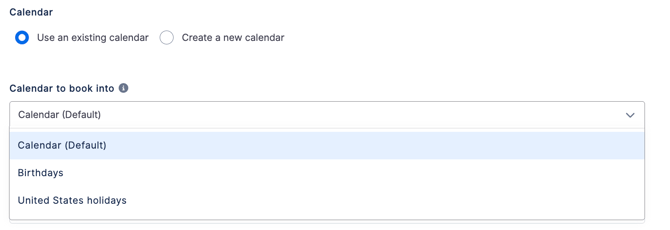
- Select Calendar - The agent reads availability from and books appointments to this calendar.
-
Bookable Hours - These are they business hours for when you would like your calendar to accessed.
Note: You can customize the hours if they differ from your normal business hours.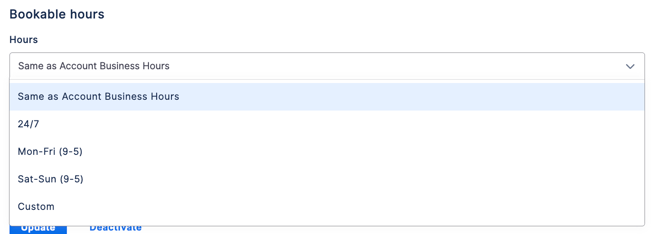
-
Same as Account Business Hours - Follows your already established account business hours
-
24/7
-
Mon-Fri 9am-5pm
-
Sat and Sun 9am-5pm
- Custom: Set up different unique hours that differ from the already established account business hours
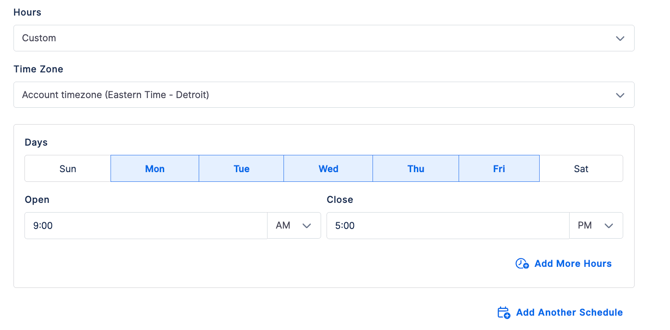
-
- Time Zone
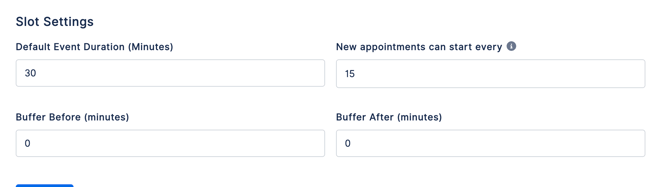
- Slot Settings - Here you will need to set:
* Default Event Duration (Minutes)
* New Appointments Can Start Every
* Buffer Before (Minutes)
* Buffer after (Minutes)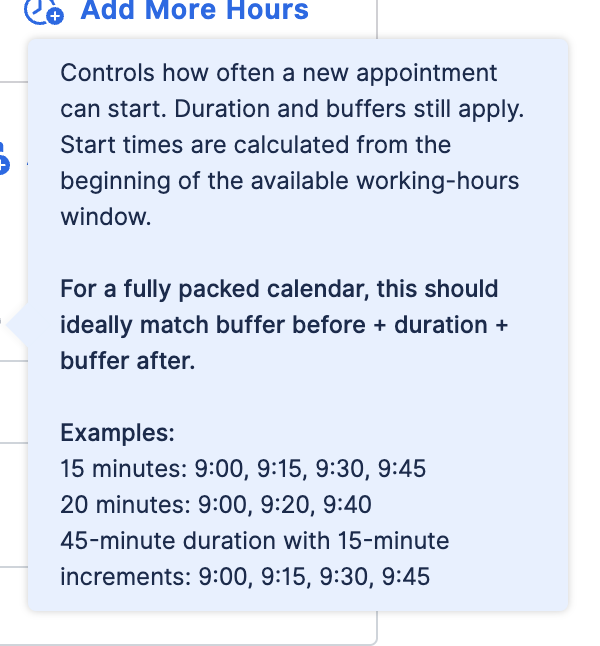
Once your Configuration is complete, hit Activate.
Step 4: Verify Your Connection
Under Connection > hit Verify
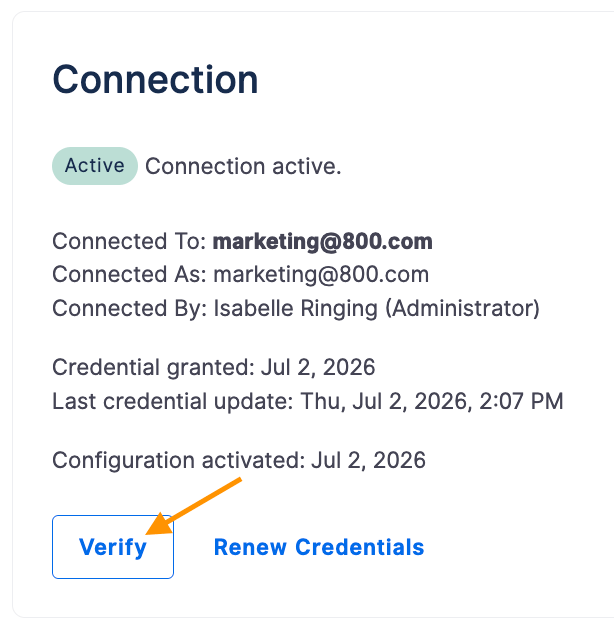
Once verified you will see a green message at the top of the dashboard confirming the connection is working correctly

Step 5: Editing/Deactivating Your Configuration
Editing Your Configuration
After completing your configuration if you need to make changes to your configuration, you can do so by clicking Edit.
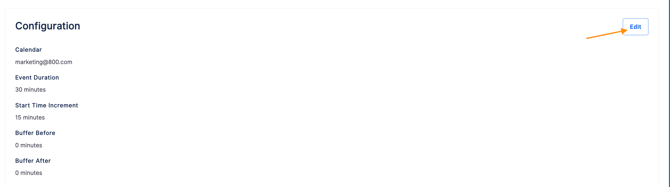
Make any changes that you may need and then hit Update.
Deactivating Your Configuration
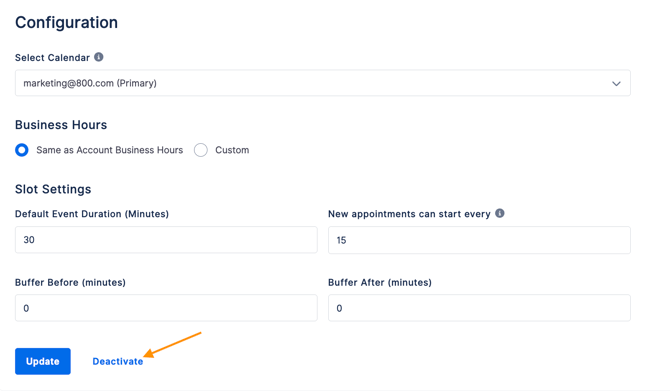
If you no longer need your configuration you can deactivate it.
Click Edit > scroll down to the bottom of the Configuration section > hit Deactivate and follow the deactivation steps.
Need Help?
If you have questions during this process, you can reach out to our support team via email: support@800.com.